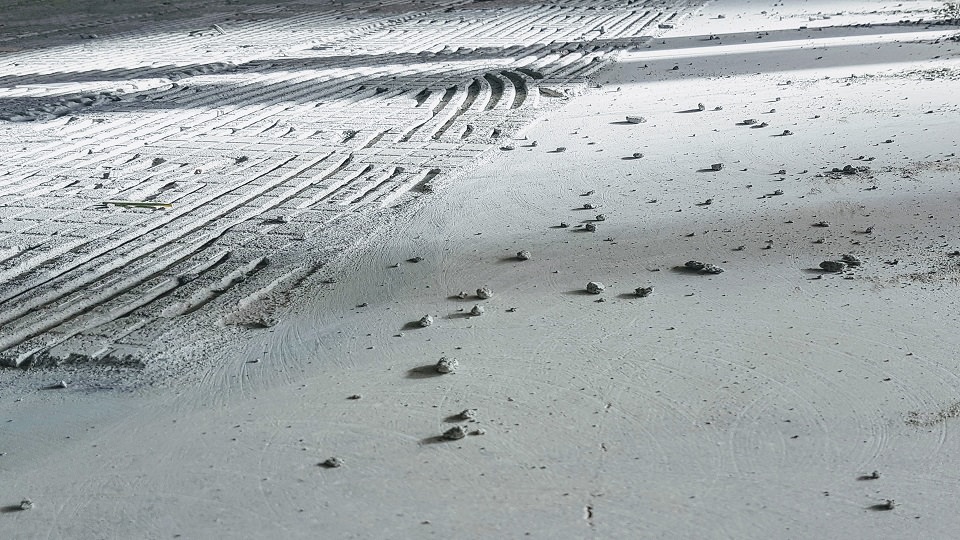
Whether you are building a new commercial space or in contrast, renovating an existing one, the quality and flatness of your concrete floor really important.
The durability and presentation of your floor’s final finish is reflected from your concrete floor. Floor flatness is certainly the most overlooked area. Quality flooring installers will in most cases not carry out the installation without suitable floor preparation.
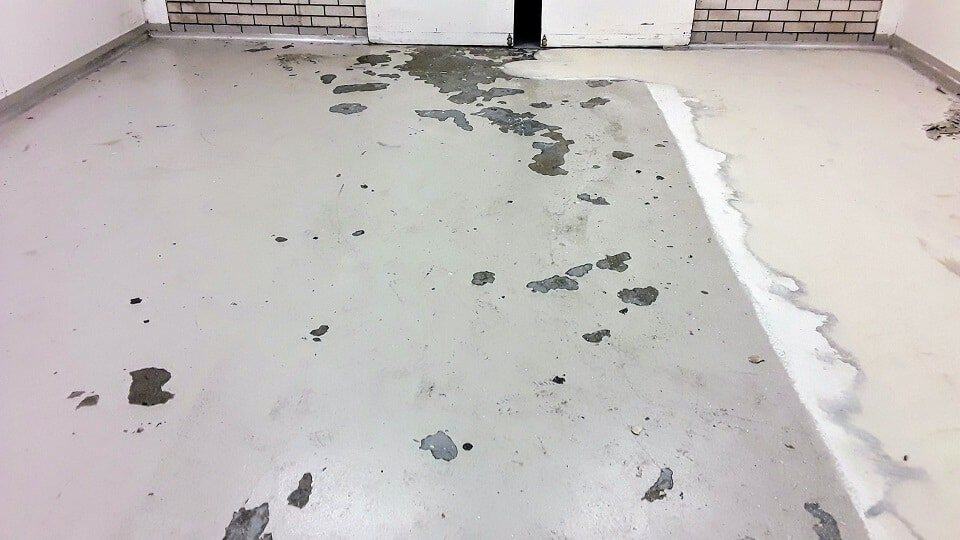
As a result of incorrect surface grinding, floor coatings peel because of this. Coating over a peeled coating again seems like a good idea right? Doing that is really bad idea.
If the existing coating is peeling, that is because the base was not prepared with textured finish. Think of it this way. How well is paint really going to go on glass?
Fortunately, Ultimate Floors has been setting high standards for skilled concrete grinding Redcliffe and around Moreton Bay region for years. We also take health and safety seriously on commercial and residential floor grinding jobs for your piece of mind.
Consequently, Silica dust problems are not taken seriously enough. Many trades now have a duty of care to follow the rules set out. While we feel Silica dust control requirements are for the better, still seems like many floor contractors aren’t investing in the right dust control equipment.
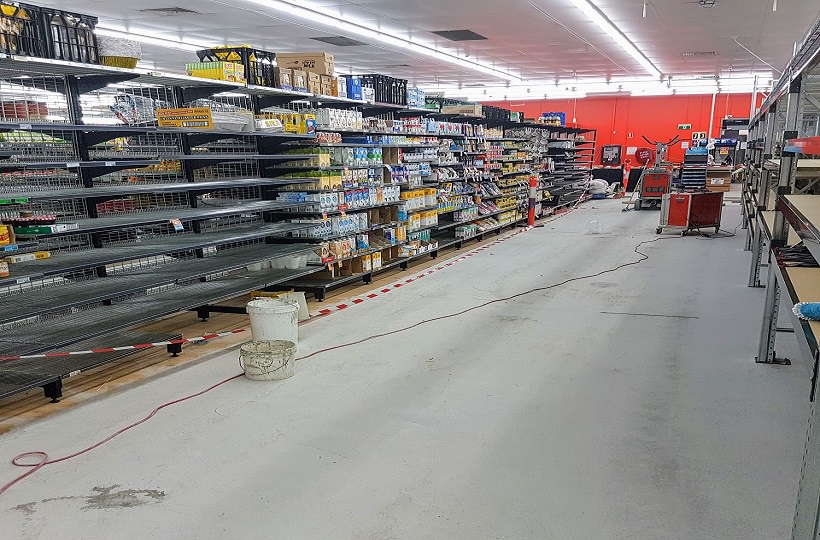
Below picture is of other tradesman fitting floor waste plates on a project nearing completion in Morayfield only last year, 2019. While the personal PPE was in place, the vacuum being used was not fit for the job. This was even more of a concern due to the dust landing on shelves.
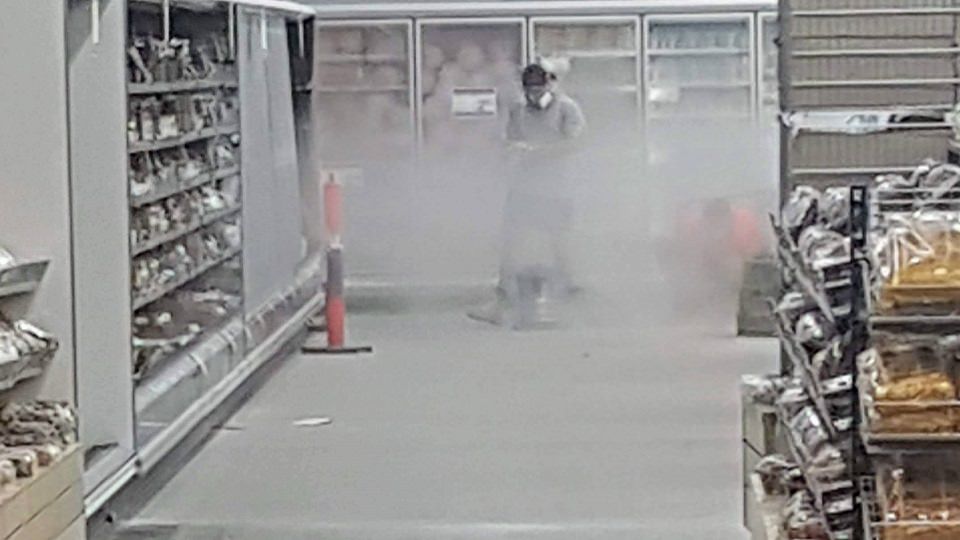
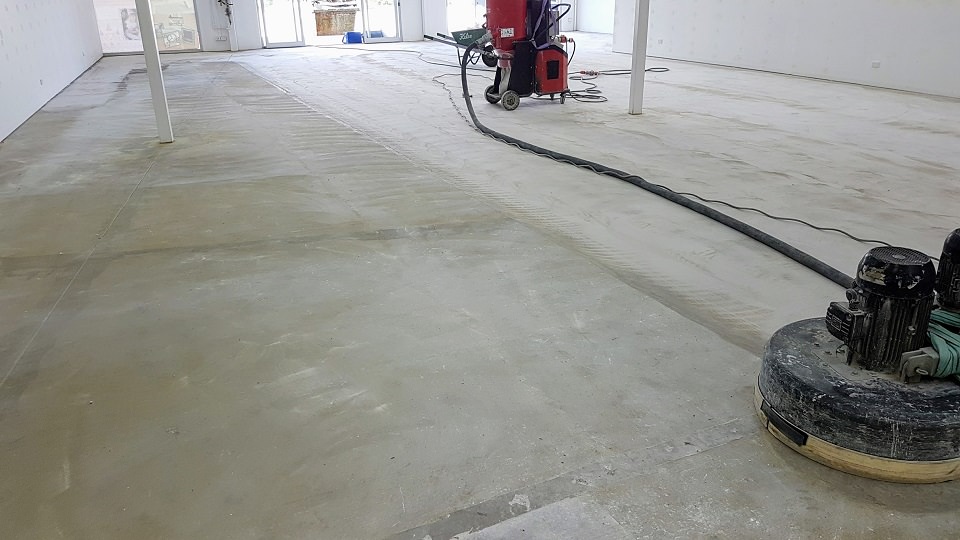
Expert concrete floor grinding and with the right dust control measures.
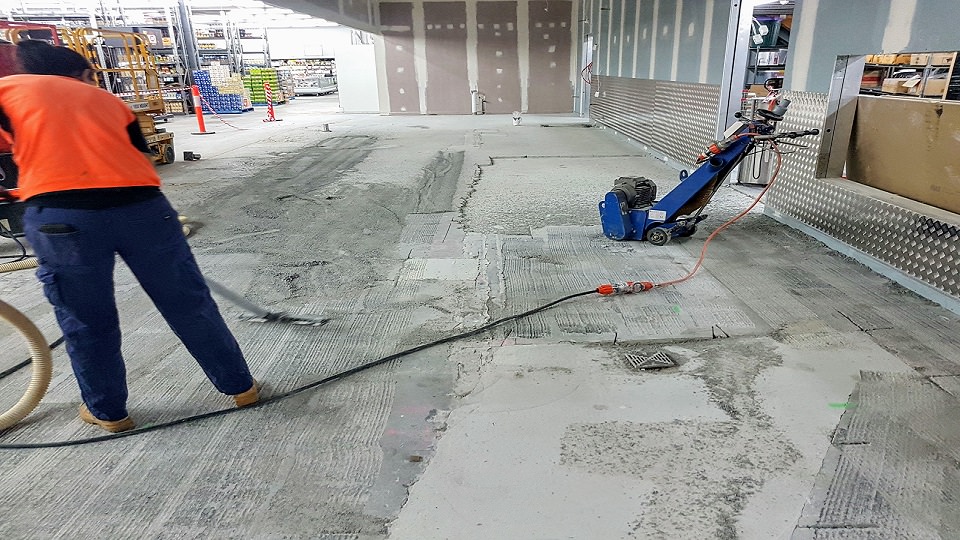
As mentioned before, on site dust control is really important. For the reason that we bring this to your attention is to highlight the steps we take to ensure our clients we are relevant and up to date.
What is also most noteworthy, concrete floors that are not sealed and always dusty should never be swept. All floor grinding, concrete shaving and shot blast floors we work with are always vacuumed.
Is dustless concrete floor grinding really possible?
Yes it is. However, only correct HEPA H13 dust extractors are used. Size and efficiency must be matched to the floor preparation machines being used.
Dustless floor grinding is really more like dust control for some grinding floors. Because there are many under sized concrete dust extractors used with larger floor grinders dust is not controlled. Size does count and dust becomes impossible to contain. Effective dust control is all about the air volume.
What we have seen more recently with concrete floor grinding is cheap imported vacuums. Problem with imported dust extractors is this – they haven’t been tested in Australia to ensure they operate to HEPA H13 requirements. This is another area professional floor prepares have to compete with.
What does HEPA mean?
As a case in point we get asked from time to time what does HEPA mean. In fact, HEPA refers to High Efficiency Particulate Air. These filters are manufactured and tested in accordance to global HEPA filter standards.
In short, dirty air comes into the vacuum and the filtered air goes out cleaned at a rate of 99.90% of all particles. Efficiency of H13 HEPA filters removes particles small as 0.003 micron.
For example, human hair is 30 to 100 micron thick in comparison. Therefore the filtered exhaust air is cleaner then the air we breathe.
In addition to our HEPA dust extractors, we also run portable air cleaners when operating indoors.
So you can now see why the right type of dust control for concrete floor grinding and is so important. For example, you will see one of our A2000 air cleaners in the work area. Yes, it is another item to move around the job site but they are equally important.
Our fleet of equipment for concrete grinding commercial floors in Redcliffe is substantial. In general, the full range of Husqvarna floor grinders are fully equipped with a suite of HEPA dust extractors as well.
Regardless of what others aren’t doing, we approach our concrete grinding Redcliffe with seriousness. As a result of this, these dust control measures are costed in to each job.
Just wanted to be transparent about this so you know upfront why we will always appear to have higher rates.
Whether you are building a new home or renovating an existing one, the quality of your floor preparation really important. That may be grinding floor glues
Considering floor tiles?
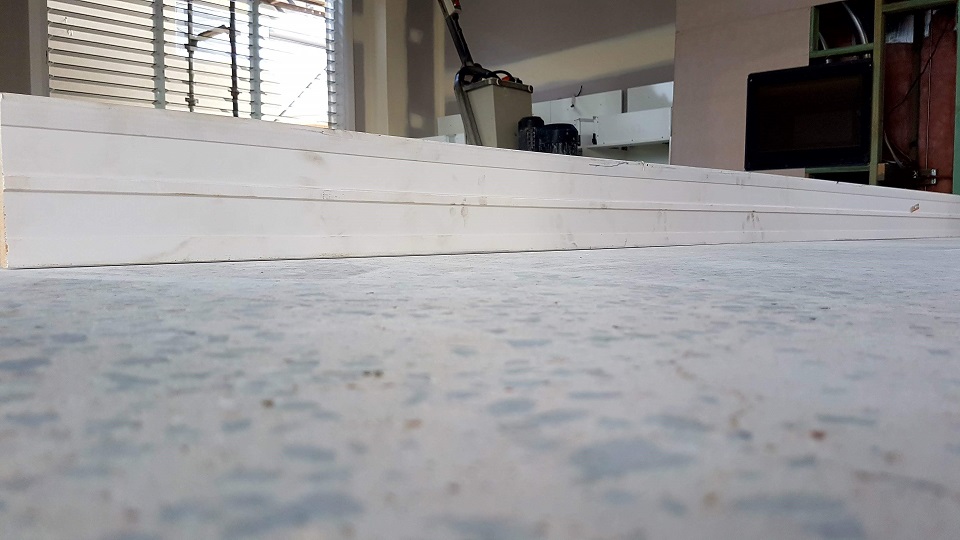
Larger the tile size or length, flatter the floor needs to be. Flat floor for rectified porcelain tile installation is paramount. Modern floor finishes such as large 600 mm by 600 mm floor tiles must have a flat concrete floor for a lip free installation.
Perhaps you are considering LVT planks? Certainly have become popular but you probably don’t know they are also reliant on a flat concrete floor.
The durability and presentation of your floor’s final finish is reflected from your concrete floor. What is certainly the most overlooked area in homes is concrete floor flatness.
The processes we use to create flatter floors for large tiles is a combination of equipment and know how. Ultimate Floors has no equal when it comes concrete grinding Redcliffe residential homes.
Getting your floor prepared correctly avoids professional installers rejecting sub-standard tolerances.
As the home owner, you rely on trade services to follow industry standards right?. Likewise, installing floor coverings is no different. Unfortunately there are still plenty of rough and ready installations done. This actually has a negative effect with quality installers following Australian Standards guidelines.
How does this affect me as the home owner?
All floor coverings certainly require a flat and smooth surface to stick to. Because concrete is usually uneven, it is not suitable to stick floor coverings to it. Flooring installers are bound by Australian Standards for a reason. Quality and fit for purpose installations!
Professional installers would rather not be responsible for sub-standard work. A failure to provide these conditions can compromise how well your floor covering adheres to the surface. Hence the reason Ultimate Floors provides result based concrete grinding in Redcliffe for home owners, flooring installers and builders.
Why choose us for your concrete floor grinding in Redcliffe?
Poor technical knowledge and understanding of what the floor finishing and covering sectors really need is a problem. There are many floor grinding services offering floor preparation who aren’t trained floor installers. Getting the floor right takes more then passing a grinder over it!
As installers and finishers with extensive field experience, fortunately we have learnt a thing or two about flooring. Also the effects contamination and moisture problems create can be costly to other building features when left unattended. Therefore Ultimate Floors can resolve all areas of your concrete floor in readiness for installation.